TWS loves chickens. He has a particular soft spot for Japanese Black Tailed White bantams. When we returned from Alaska, I wanted to make getting him some chickens at the top of the list of things to do--he works so hard for us, is such a good husband and father, and has been through enough that I wanted him to be able to have his chickens as soon as possible. Of course we had some infrastructure we had to do when we moved to our little piece of paradise first, but this spring I urged him to start thinking of a small coop. We are planning to build a much larger coop to house meat and egg layers, as well as what I call his "show chickens", but that requires more time and money than we have at the moment. I didn't want him not to have his chickens until we could build a large coop, so I encouraged him to build a small coop beside the barn. Of course the little coop that we had envisioned became much more complex than we had originally thought, but our motto is "If it is worth doing, it is worth overdoing"--and his craftsmanship shows that. So late this spring we started building our little coop.
We finally got our chicken coop done just as summer ends. It was a labor of love and took all summer but I think it turned out wonderfully. TWS engineered it. We ladies got to put our decorating ideas to work. All four of us (but mostly TWS) built it.
Every part of this coop was built with three things in mind: health and enjoyment for the chickens, ease of use for us, and cost savings. We could have built a coop out of scrap wood, but we wanted it to last for many, many years. Additionally, I wanted it to add visual appeal to the land. Plus a lot of choices we made look frivolous but have specific purposes (for example, painting the wood obviously allows it to last longer). We scrounged and scavenged what we could. We built from scratch, looked for bargains, visited the ReSale Store, etc.
Today, TWS and DD are returning from picking up the chickens! Let me give you a tour before the new tenants move in :)

The Outside of the Coop. The cupola is functional--it has a bathroom vent in it to reduce the moisture in the coop and promote air flow.
There is a little stoop and a bed that is filled with chard, lettuce, herbs for us or for the chickens :)


(Because the ladies need a place to get fan mail :) )
To the right of the coop photo above, you can see the gate that we can use to enter the back, enclosed area that you are now in....


The larger opening you see is the vent to promote air flow inside the coop. In the winter there is an insulated panel that goes in there to keep the heat in. The smaller opening is an automatic door that opens in the light and closes when the sun sets. There are also motion sensor lights in case anything gets in. We worked hard to make sure that the chickens were safe, including sinking wire deep into the ground, putting a concrete floor inside the coop, completely enclosing everywhere the chickens can go in wire or net to keep the hawks and owls out, etc.


A closer look at the larger of the two runs. You can see the several different types of wire and netting we used to discourage predators. The little outlined hatch at the bottom of the coop is the clean out. We can open that hatch and just sweep the entire contents of the coop out of there to make cleaning easier.
Speaking of inside the coop, let's go look!

This is the view as soon as you enter the coop. This is the work area for us folk. It is a bit of a tight squeeze :). To the right is the work table. This is one of the fabulous deals we were able to find. Lowes was getting rid of a display of Corian countertops. TWS was able to buy all the counter pieces for a song. This provided the counters for the coop AND provided an excellent counter and sink combo for my catfish cleaning station (which is our next project).
On the right are the nesting boxes. The open from the back for easy egg removal and cleaning.
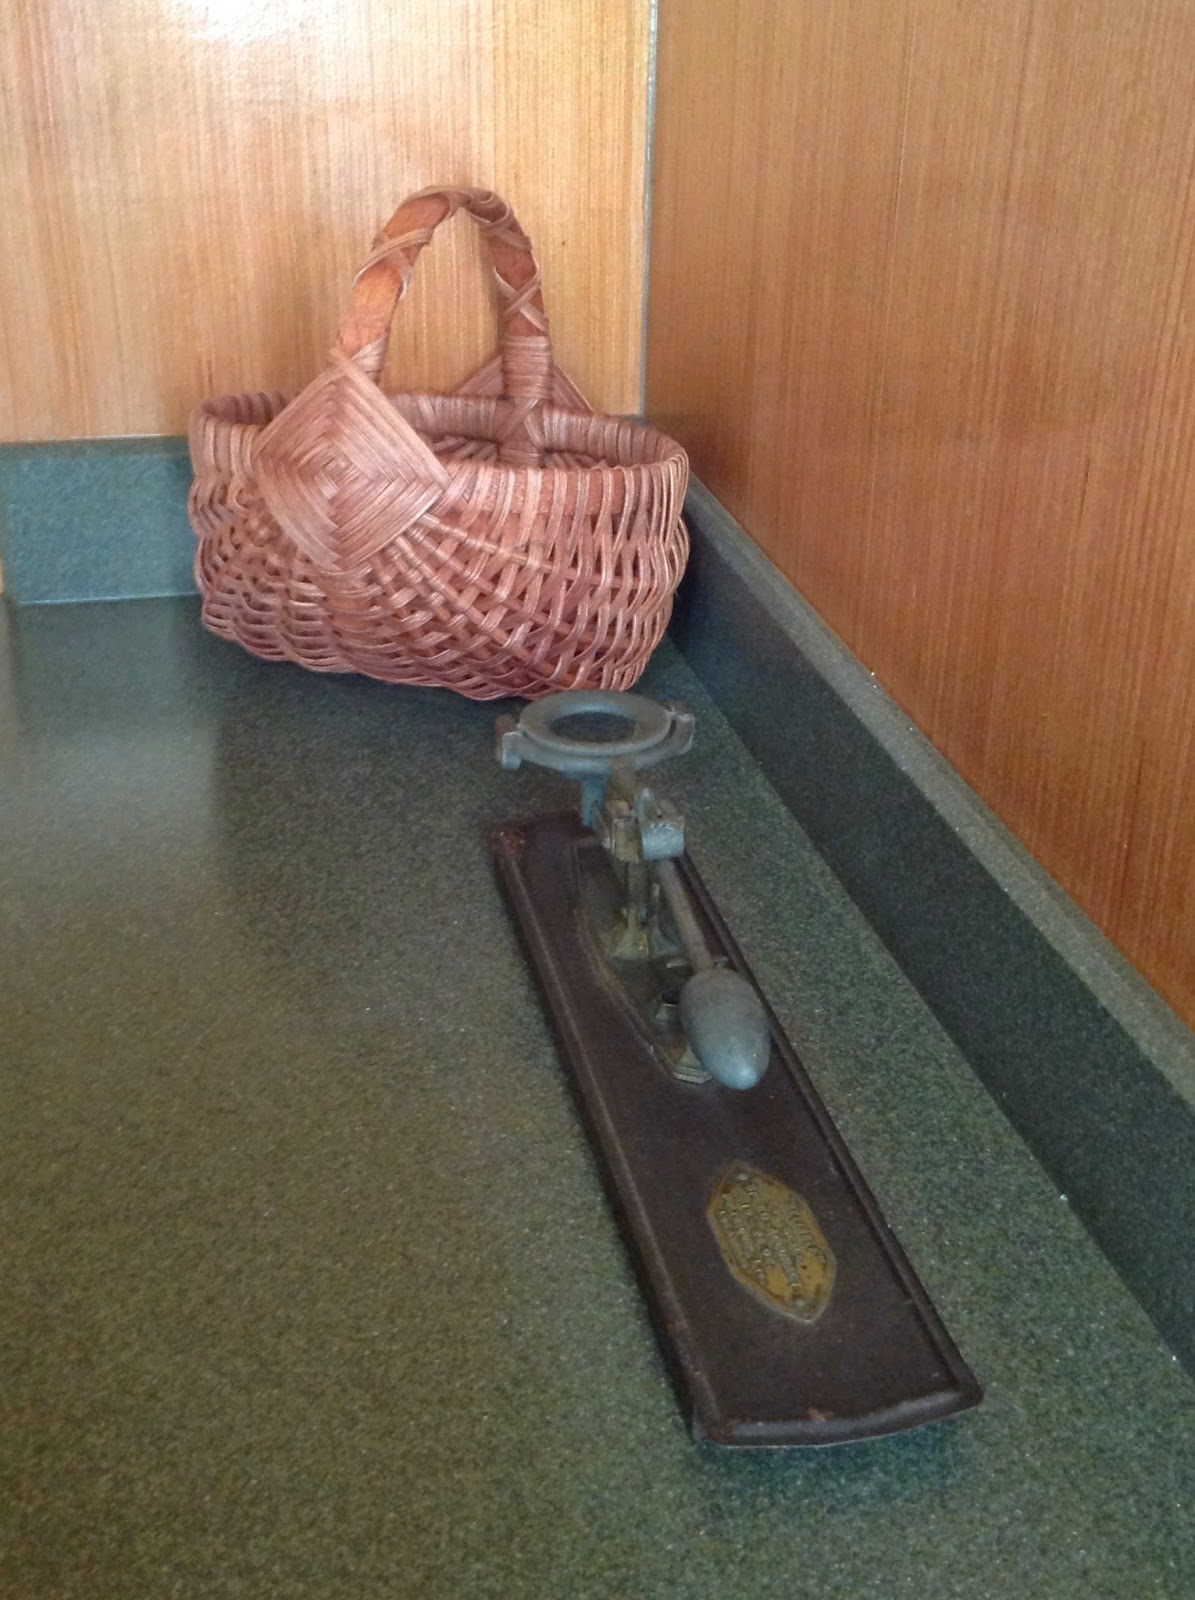

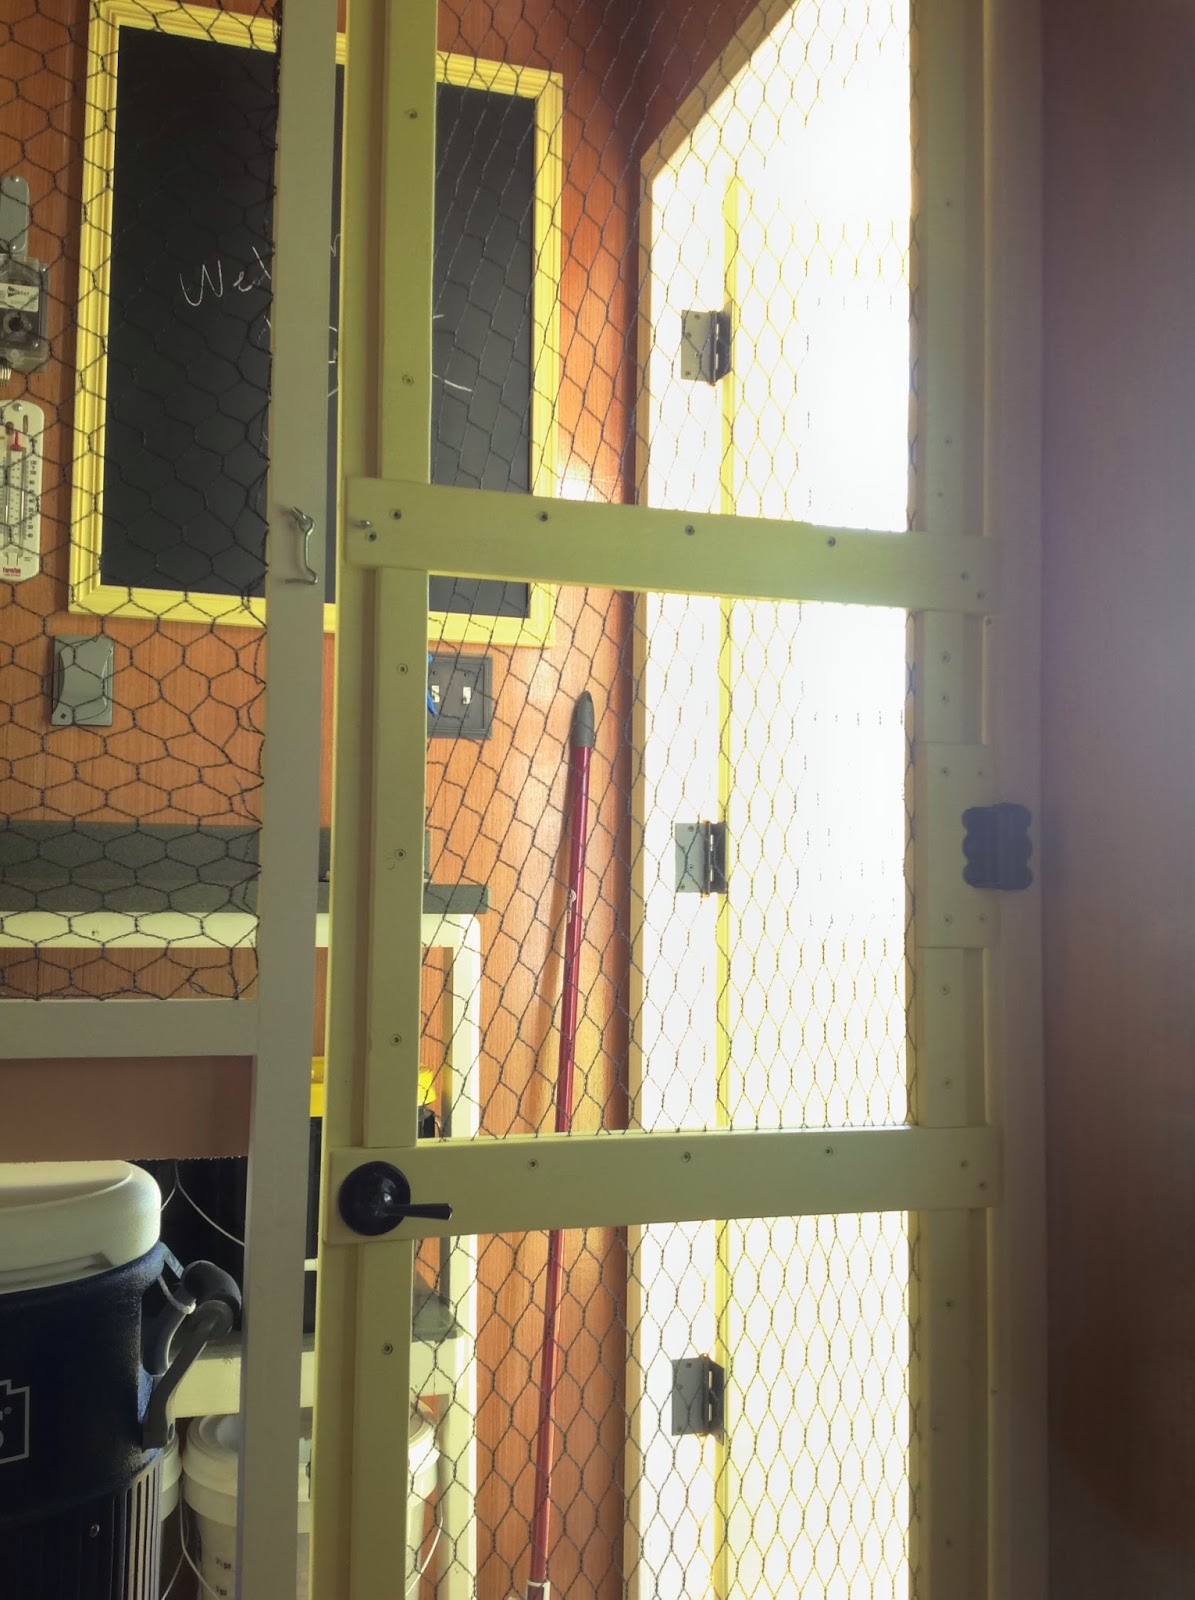
This wall is immediately on your right in the work area. There is a pegboard for implements, the candler, etc. He can keep an eye on how hot or cold the coop gets as that thermometer registers highs and lows. The chalkboard (upon which he wrote "Welcome Home" <heart melts>) is for keeping track of medications, notes, etc.

Under the table is storage for grit, feed, medications, etc. All organized and orderly (that would be his doing)

Awww! Even tough military guys have little tiny tender places tucked here and there. What a treasure when you discover one!
These are the nest boxes. He designed them, again, for ease of use and chicken comfort. He used a long "leaf" artificial turf to keep the chickens comfy and to make it easy to clean. The boxes and the bottom of the coop itself are lined in a material that is slick like plastic but has no off-gassing of chemicals.

As you stand in the doorway, the door to the coop itself is on your immediate left. It only opens inward. The waterer is made out of a water cooler from Lowes and a special attachment that fits the spigot for the chickens to drink from. This will keep their water clean.

Above is a closer picture of the waterer. The red nipples encourage pecking so the chickens can find the water. It is also easy to clean. This is inside the coop and I am getting ahead of myself :)
Let's go inside!

Through the coop door. Yep, that is what it looks like.....

A chandelier!!! Ok, I admit that this was entirely my doing. I just felt that The Ladies needed something pretty (I adore chandeliers and would have them all over my house, but the right sized ones for our house are pricier. This was a tiny little powder room chandelier on sale from Overstock--I couldn't refuse.)

Here is the roost. You may have noticed the mahogany walls. No, we are not pretentious about the chickens :). Actually this was the cheapest thin plywood we could find! It just happened to have this wonderful, beautiful mahogany top ply. I wish you could see it in person--it shines like satin ribbons.

This is the view above the nest boxes. These are taller ceilings than many coops, but it was cheaper and easier to just make the coop the height of the plywood. No waste, no cutting. This is what I mean about looking like we are spending money when we really were saving it :)

Ok, besides the chandelier, this is my favorite part! Curtains on nest boxes serve some extremely important health, safety, and comfort functions. They make the chickens feel secure. They both encourage brooding (if the chicken lays) and discourages brooding from non-laying chickens (who can't see the brooding chicken). It helps prevent cannibalization of the eggs, and (TMI warning!) it keeps other chickens from pecking at the red cloaca of the laying hen which could could seriously injure or kill her.
But why just tack up burlap (which is stringy and I am not sure is healthy) when I can scavenge for incredible deals on vintage linens and use those instead? :)

On the wall to the left of the nesting boxes is the back wall. Here you can see a better picture of the vent which, again, has an insulated insert for winter. To the left of that is the automatic door, and you can see the white smooth lining of the bottom of the walls so we can just hose out the coop.

This is the clean out panel right under the roost.

This is the inside feeder right under the window. We got an incredible deal on the window!
And we are back at the door of the coop!

I hope you enjoyed the tour!